Optical Strain Measurement New Service from Test Devices
May 26, 2016
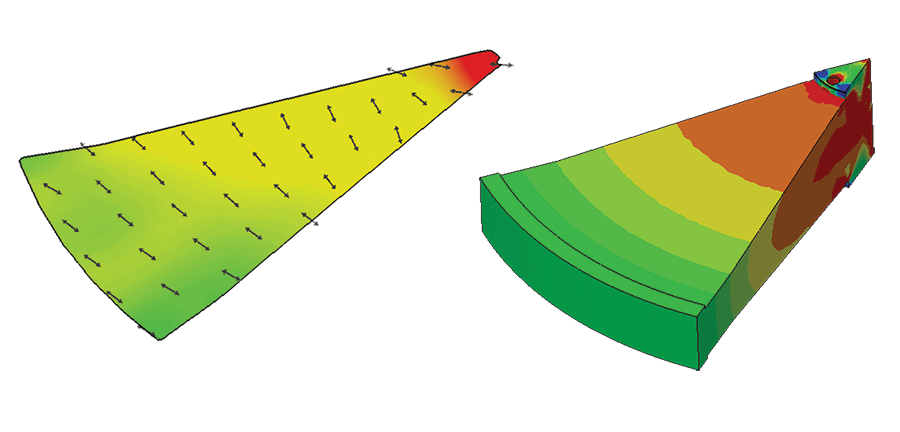
Recent progress in computational capacity and image analysis techniques now facilitates in-situ rotational optical strain measurement. This allows Test Devices’ customers to capture strain data over a full component, such as a turbine disc, while spin testing.
Optical strain measurement can measure and record surface strain at thousands of locations simultaneously. Data can be used on its own or to supplement data generated by traditional in-situ methods such as strain gaging, growth probes and post-test dimensional measurement.
Traditional strain measurement techniques collect data only from a selected number of locations. Decisions on where to locate strain gages are typically based on analytical models or “educated guesses.” Often, the manner in which a gage is mounted, and the interpretation of the resulting data, is a topic of debate. The strain map generated with an optical system provides a richer and more complete picture of any component deformation.
Optical strain measurement is ideal for studying small or complex component features such as turbine blades and impellers. It is very difficult to strain gage “tight” locations reliably. Furthermore, bonding
a gage to a small feature could alter its deflection upon loading.
In addition to providing high-value engineering data, optical strain measurement, as a non-contact technique, offers several advantages:
- Reduced cost and ease of test set-up: Bonding of strain gages and lead wires is a costly, time-consuming process. For rotating parts, lead wires must be routed and attached to a slip ring connected to the data acquisition equipment. Eliminating gages and lead wires allows engineers to easily modify, inspect or reconfigure a test (e.g. swapping turbine blades).
- Reduced risk: Bonded strain gages and lead wires are subject to large “g” forces on rotating hardware, and often to elevated temperature conditions. Unfortunately, gages may occasionally detach during testing, compromising the data obtained.
- Greater applicability: Optical strain measurement equipment can be set up in stand-off positions; outside of a test chamber entirely, if sightline ports are available. This enables strain measurement during testing under extreme conditions (e.g. high temperatures or aggressive environments) that would damage contact and proximity gages.
Optical strain measurement has been used for over a decade on static components. Applying it to very high-speed rotational components is relatively new, so Test Devices is addressing challenges and developing improvements to make optical strain measurement an economical “go-to” tool for a wide range of high-speed testing and production applications.
To learn more about Test Devices’ optical strain measurement services, contact Rich Bentley or 714-794-7072.


